Overview
After doing some research, I came to the conclusion that adding another flavour of the app was necessary in order to solve the problem I encountered with the Google Play Store permissions. Essentially, the issue was that the Google Play Store did not like the new in-app update feature I created, specifically the REQUEST INSTALL PACKAGES permission. In this article, I will walk you through how to create new product flavours and how I used it to get around this problem.
Build Types
When a new project is created, it initially has two build types or variants: debug and release. When we run the application directly from the IDE onto a device, the build type we use is called debug. A release is the build type that requires you to sign the APK. Release builds are meant to be uploaded to the Play Store. To prevent reverse engineering, we use ProGuard to obfuscate the code in the release build type.
buildTypes {debug {signingConfig signingConfigs.common}release {signingConfig signingConfigs.commonminifyEnabled enableProguardInReleaseBuildsproguardFiles getDefaultProguardFile("proguard-android.txt"), "proguard-rules.pro"}}
Android Product Flavours
Some typical examples for new flavours include free or paid versions, but in my case with BuffaloGrid, I used:
- Hub version: When a user scans the QR code directly from the physical hub, this version is downloaded.
- Store version: When a user downloads the app from the Google Play store, this version is automatically installed. Since in-app updates are managed by the Play Store, this version doesn't require the in-app update feature.
Below is an example of how I created a new product flavour in Android Studio.
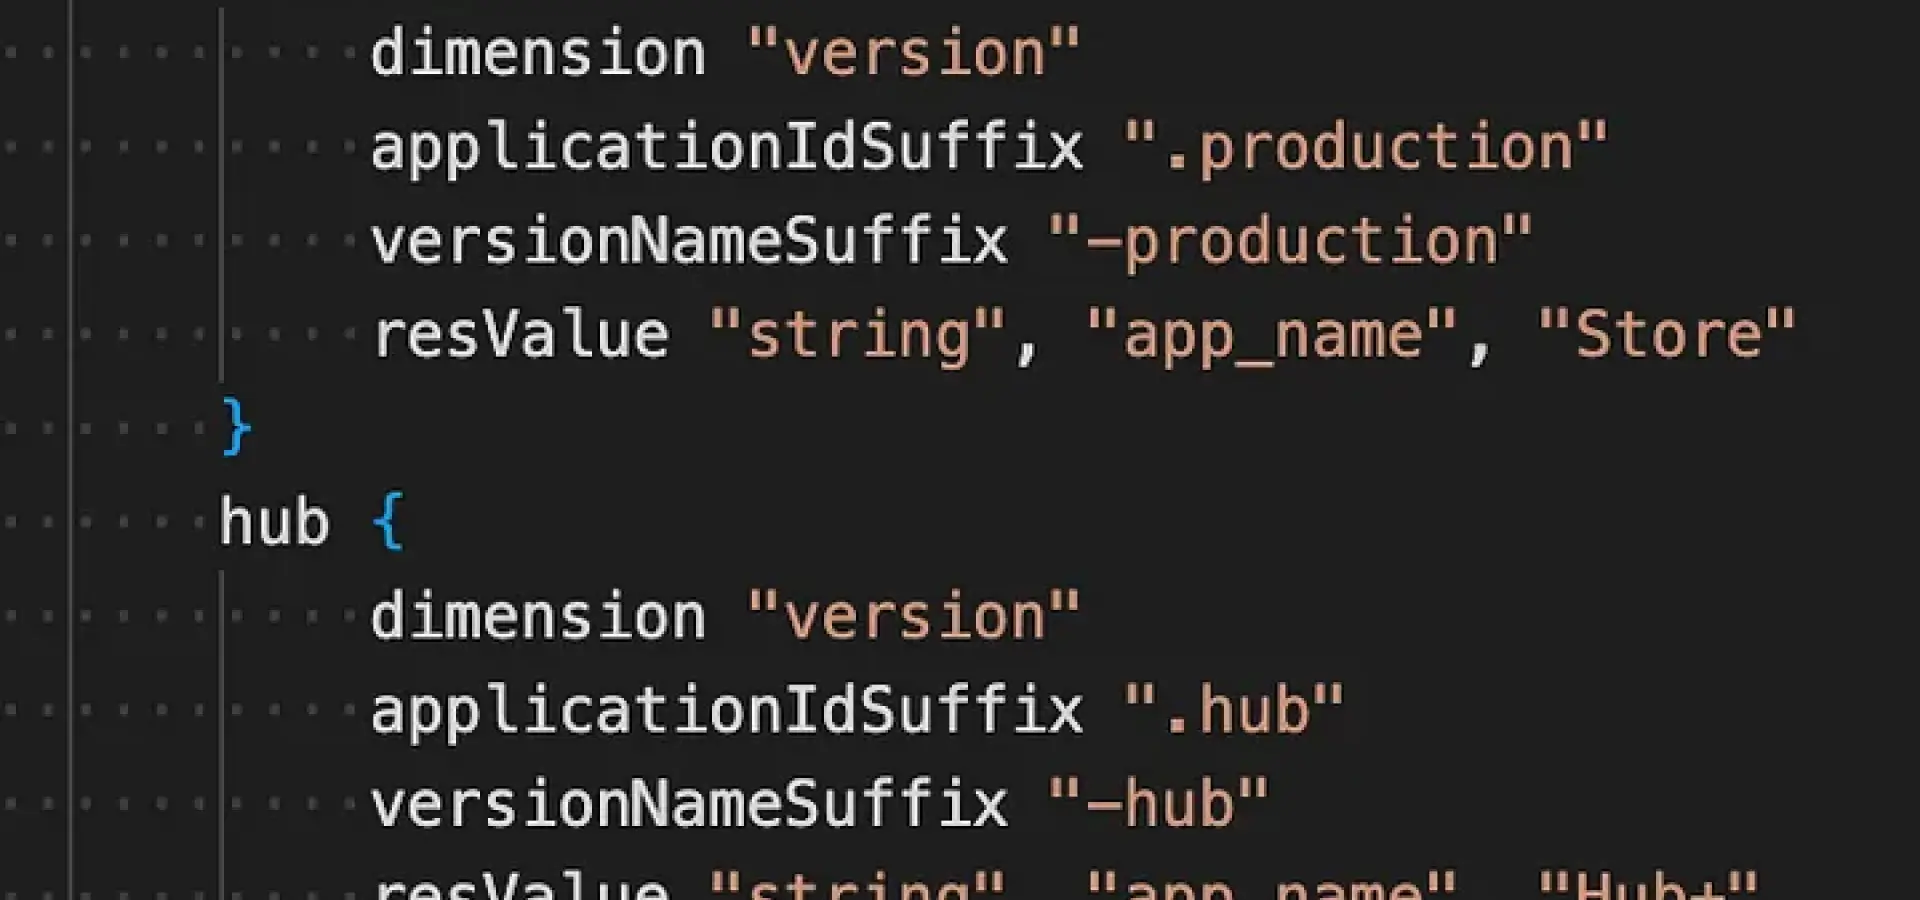
flavorDimensions "version"productFlavors {full {dimension "version"applicationIdSuffix ".production"versionNameSuffix "-production"resValue "string", "app_name", "Store"}hub {dimension "version"applicationIdSuffix ".hub"versionNameSuffix "-hub"resValue "string", "app_name", "Hub+"}}
As you can see, a new product flavour has been created called hub. This means additional features can be added specifically to this variant of the app. The versionNameSuffix will be displayed when the user opens the app information while the resValue can be used to override a value of the flavour. In this case, we’re overriding the value of the app_name field. This is then the name of the app displayed under the icon on a device.
The structure
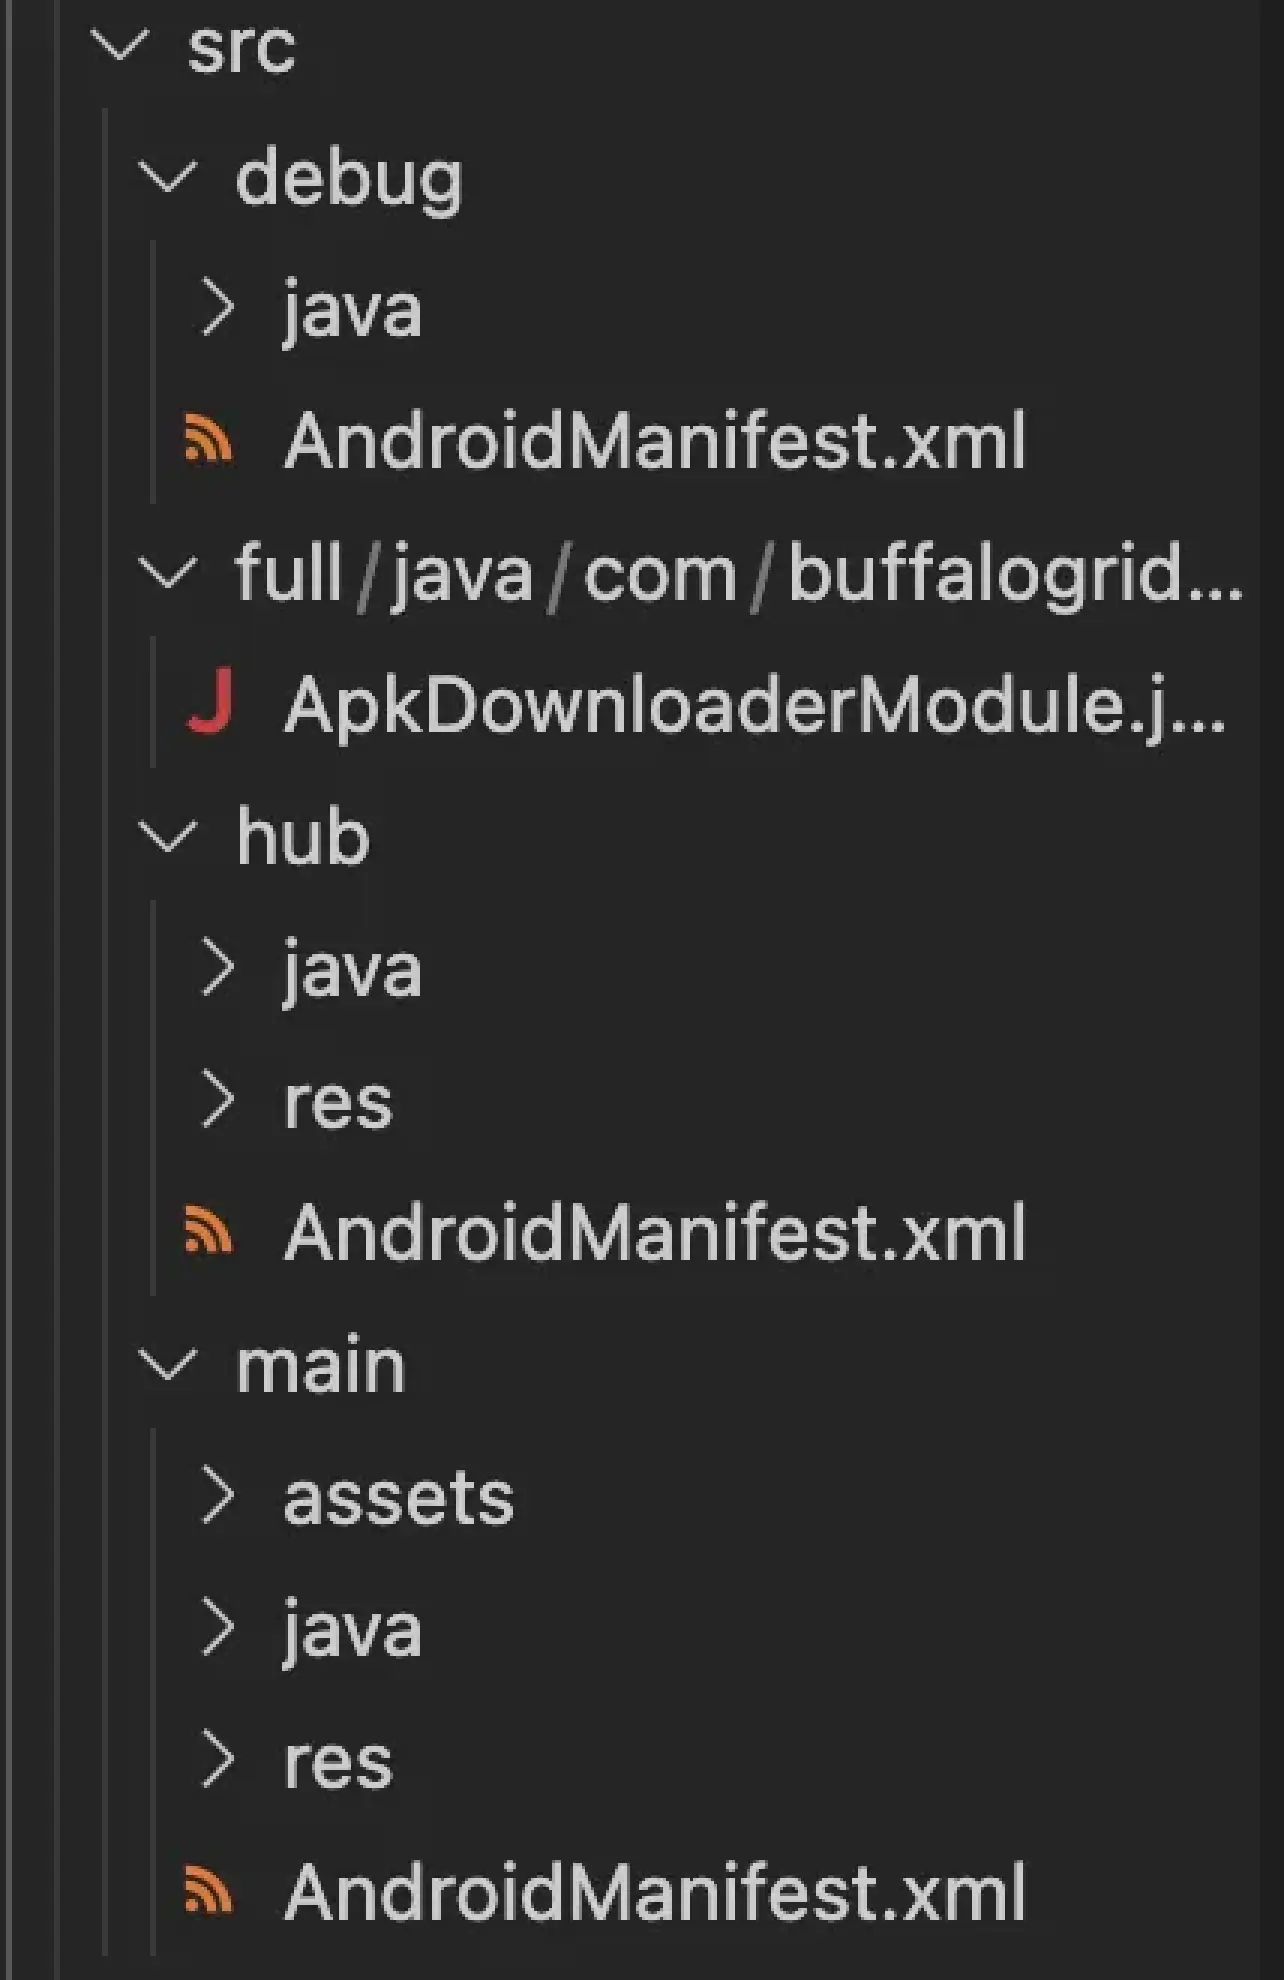
The main folder should consist of the common logic for all app versions. To write flavour-specific code, create a folder with the same name as the flavour. The src/main folder acts as the default for all flavours, and the src/hub or other specific folders will override it where needed.

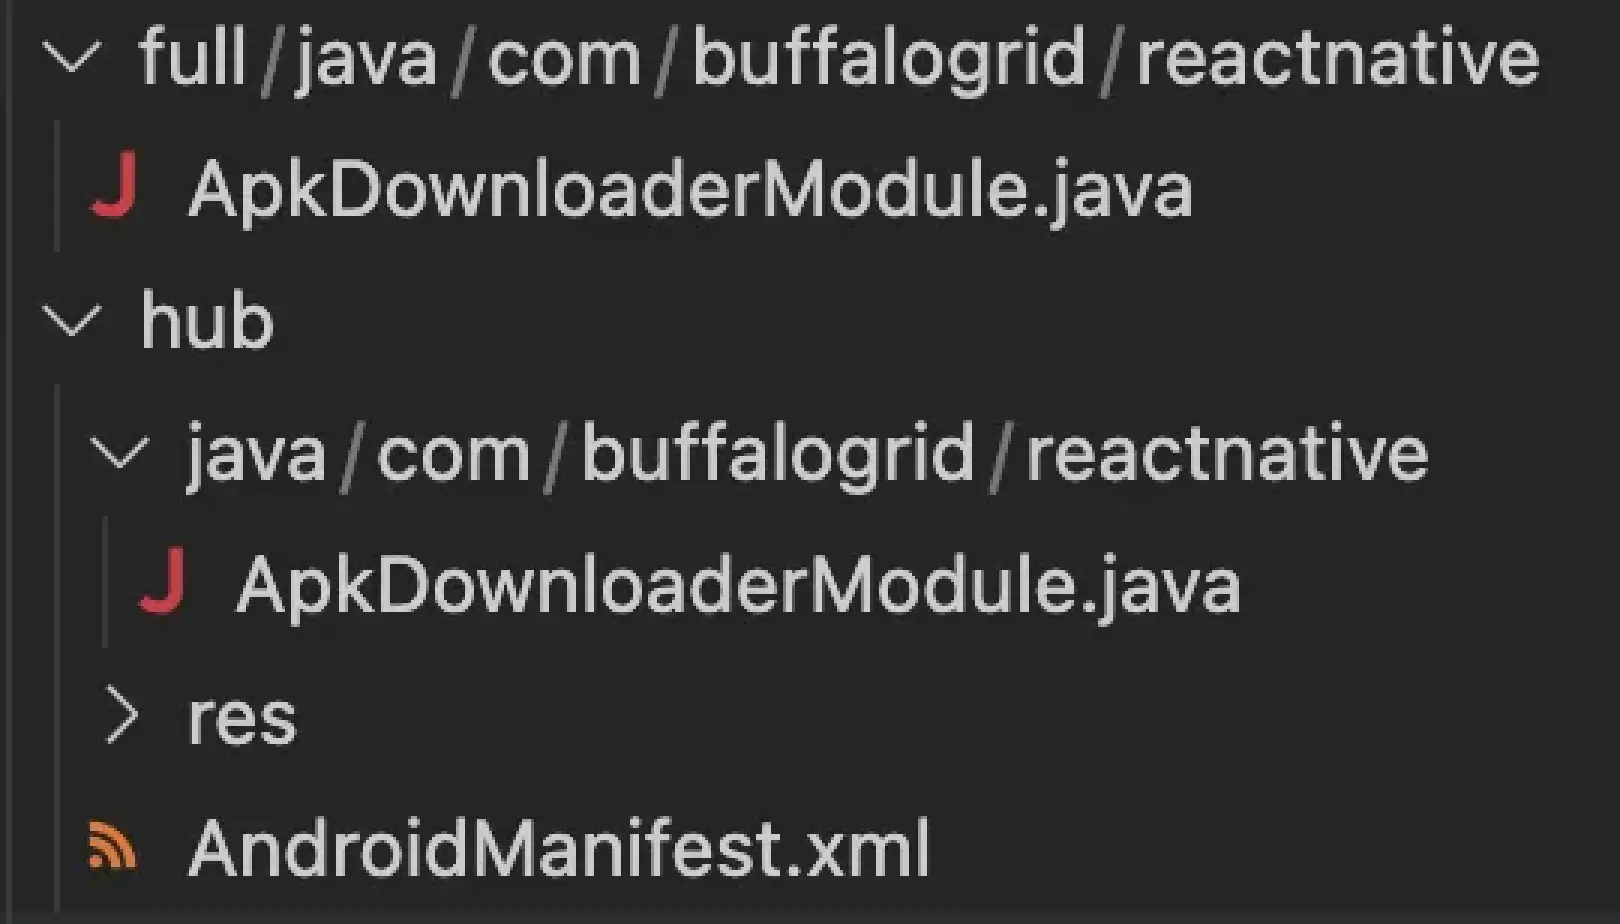
Due to this, I created subdirectories within the same hierarchy as the main folder for new layouts, drawables, and values for various flavours. This was crucial because the entire code and folder structure contained in src/main serves as the default for all the app flavours. This required me to create a new AndroidManifest.xml file in src/hub and add the REQUEST INSTALL PACKAGES permission as it’s only needed by the hub flavour. The fact that all the manifests are combined means you don’t have to repeat all the settings in each manifest, which is a crucial point to note. For this reason, all that is required is that you add the REQUEST INSTALL PACKAGES permission to the AndroidManifest.xml file in the src/hub directory. As a result, all of the Java code for in-app updates was transferred to the src/hub/java folder. As seen below, this is the new Android Manifest within src/hub.
<manifest xmlns:android="http://schemas.android.com/apk/res/android"package="com.buffalogrid.reactnative"><uses-permission android:name="android.permission.REQUEST_INSTALL_PACKAGES" /></manifest>
What about the Javascript side?
This technique is particularly helpful for overriding Java code, but not JavaScript code. As I only wanted the in-app feature option to appear and function while the hub flavour of the app was running, this was one issue I ran into. I’ll describe how I overcame this problem in more detail below.

I have an ApkDownloaderModule.java file in each of the product flavour folders of the app’s file structure. They contain the Java code required for the functionality of the in-app update feature. Then, on the JS side, we can utilise Callbacks, Promises, and Exporting Constants to differentiate between the different app flavours and achieve different behaviours for each. Exporting Constants seems to be the best option since the value indicating whether the in-app update should be enabled will never change. The ApkDownloaderModule can export constants by implementing the native method getConstants(), which is available in JS. You can override getConstants() and return a Map that contains a DEFAULT_EVENT_NAME constant, which you can access in JavaScript. An example of this, implemented successfully, can be seen below.
// In src/hub/ApkDownloaderModule.java@Overridepublic Map<String, Object> getConstants() {final Map<String, Object> constants = new HashMap<>();constants.put("UPDATE_ENABLED", true);return constants;}// In src/full/ApkDownloaderModule.java@Overridepublic Map<String, Object> getConstants() {final Map<String, Object> constants = new HashMap<>();constants.put("UPDATE_ENABLED", false);return constants;}
This is the implementation within src/hub/ApkDownloaderModule.java where the in-app update will be enabled. The same implementation has been added to src/full/ApkDownloaderModule.java, however, the constant UPDATE_ENABLED is equal to Boolean.False. This is due to the in-app update functionality not being needed in the store flavour of the app.
The UPDATE_ENABLED constant can then be accessed by invoking getConstants() on the native module in JS. I’ll demonstrate how I implemented this functionality using React Native.
import { NativeModules } from 'react-native';const { ApkDownloaderModule } = NativeModules;const App = () => {const [updateEnabled, setUpdateEnabled] = useState(false);useEffect(() => {const fetchConstants = async () => {const constants = await ApkDownloaderModule.getConstants();setUpdateEnabled(constants.UPDATE_ENABLED);};fetchConstants();}, []);return (<View>{updateEnabled && <InAppUpdateComponent />}</View>);};
- Firstly, I imported
NativeModulesfrom react-native. This means the ApkDownloaderModule and its native methods can be accessed. - I then created a new boolean state to store the result of the UPDATE_ENABLED constant.
- I created a useEffect hook to call
getConstants()and then store the result. ApkDownloaderModule has been passed in as a second argument to the hook. This means a re-render will only occur when there’s been a change to the ApkDownloaderModule.
As a result, logic can then be added to components using the new updateEnabled variable to display certain functionality only if the value is true. This approach allowed the store version of the app to be re-published to the Google Play Store without any problems, as it didn’t contain the REQUEST INSTALL PACKAGES permission or any of the in-app update functionality.